Table of Contents
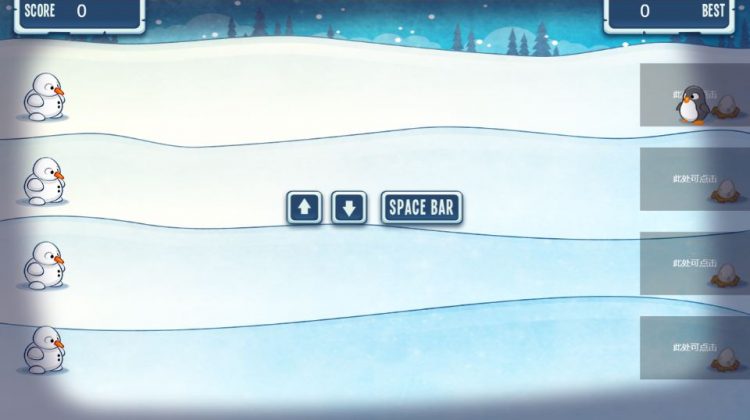
首先需要说明的是,《snowmen-attack》是 Phaser 案例自带的小游戏,我只是改成了 webpack 开发方式,添加了缩放和移动端触摸支持。
原版《snowman-attack》地址:https://github.com/photonstorm/phaser3-examples/tree/master/public/src/games/snowmen%20attack
Phaser 版本:3.50.1
改版《snowmen-attack》地址:https://github.com/tonyzhou1890/snowmen-attack
webpack 模板
我用的开发模板是 phaser3-project-template。如果是简单的小游戏,这个模板够用了,但如果规模大点就不建议了,因为这个模板真的很简陋。
为了支持将 public 目录(自建的资源目录)的资源拷贝到 dist,需要安装 copy-webpack-plugin,我安装的 6.2.1 版本,因为新版会报错。为了支持 css,安装了 css-loader 和 style-loader。配置如下:
// webpack/base.js
const webpack = require("webpack");
const path = require("path");
const HtmlWebpackPlugin = require("html-webpack-plugin");
const { CleanWebpackPlugin } = require("clean-webpack-plugin");
const CopyWebpackPlugin  = require('copy-webpack-plugin')

module.exports = {
  mode: "development",
  devtool: "eval-source-map",
  module: {
    rules: [
      // ……
      {
        test: /\.css$/,
        exclude: /node_modules/,
        use: [
          {
            loader: 'style-loader'
          },
          {
            loader: "css-loader"
          }
        ]
      },
    ]
  },
  plugins: [
    // ……
    new CopyWebpackPlugin({
      patterns: [{
        from: path.resolve(__dirname, "../src/public"),
        to: './public'
      }]
    })
  ],
};
分辨率适配
Phaser 的案例分辨率基本都是写死的,比如这个小游戏,写死的 1024 x 768。这在实际情况下是不可行的。游戏分辨率的适配和平时图片、看板的适配是差不多的,无非等比缩放、裁切、拉伸等。然而这些都不是我需要的,我需要的是按照宽/高缩放,另一边自适应。有点词不达意,还是画图吧。
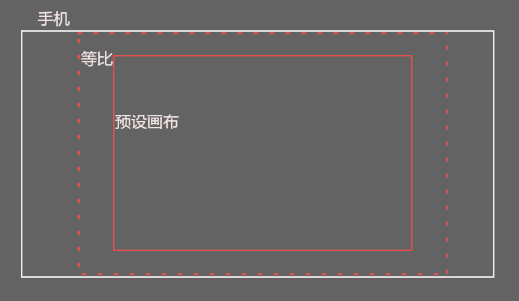
如图。白色边框为手机尺寸(目标分辨率),虚线为保持宽高比缩放的结果,红色为预设分辨率。我的期望目标是适配白色。所以我的做法是,不保持画布宽高比进行缩放。先按照手机的宽高比调整画布的宽/高,然后计算缩放比例。游戏里的相关数值根据调整后的宽/高计算。不考虑缩放比例,整体的缩放交给游戏引擎。
// utils.js
/**
 * 获取系统信息,并计算目标宽高和缩放系数
 * @param {number|undefined} initWidth
 * @param {number|undefined} initHeight
 */
export function systemInfo(initWidth, initHeight) {
  const DPR = window.devicePixelRatio
  const pixelWidth = window.innerWidth * DPR
  const pixelHeight = window.innerHeight * DPR
  let targetWidth = initWidth ?? pixelWidth
  let targetHeight = initHeight ?? pixelHeight
  let ratio = targetWidth / targetHeight
  let scale = pixelWidth / pixelHeight > ratio ? pixelHeight / targetHeight : pixelWidth / targetWidth
  let offsetX = (pixelWidth - scale * targetWidth) / 2
  let offsetY = (pixelHeight - scale * targetHeight) / 2
  let fitWidth = pixelWidth / scale
  let fitHeight = pixelHeight / scale

  return {
    innerWIdth: window.innerWidth,
    innerHeight: window.innerHeight,
    DPR,
    pixelWidth,
    pixelHeight,
    initWidth,
    initHeight,
    targetWidth,
    targetHeight,
    ratio,
    scale,
    offsetX,
    offsetY,
    fitWidth,
    fitHeight
  }
}
// index.js
const { fitWidth, fitHeight } = systemInfo(1024, 768)

const config = {
  type: Phaser.AUTO,
  parent: 'root',
  width: fitWidth,
  height: fitHeight,
  backgroundColor: '#3366b2',
  scale: {
    mode: Phaser.Scale.ScaleModes.FIT
  },
};
这个游戏里我只用到了 fitWidth 和 fitHeight,其余的忽略。
另外,还需要考虑横屏和全屏。因为这是一个横屏游戏,所以在只有横屏的情况下,才能开始游戏。
// utils.js
/**
 * 横屏检测
 */
export function isLandscape() {
  return window.innerWidth > window.innerHeight || (window.orientation === 90 || window.orientation === -90)
}
因为 pc 没有 orientation 属性,所以只需要宽度大于高度就可以。
至于全屏,这个只能在非全屏的情况下给用户一个按钮,用户点击按钮后调用浏览器全屏 api,然后开始游戏。
// utils.js
/**
 * 全屏检测
 */
export function isFullscreen() {
  return document.fullscreenElement === document.querySelector('#root')
}
// index.js
/**
 * 点击按钮的回调
 * 设备检查,其中宽度大于高度是必须的
 */
function checkDevice() {
  if (!isLandscape()) return
  if (!isFullscreen()) {
    document.body.requestFullscreen()
      .then(res => {
        setTimeout(() => {
          startGame()
        }, 16);
      })
  } else {
    startGame()
  }
}
这里不管调用全屏是否成功都开始游戏。因为并不是不能玩,只是体验不佳而已。添加的延迟是为了确保全屏已经完成。
触摸屏适配
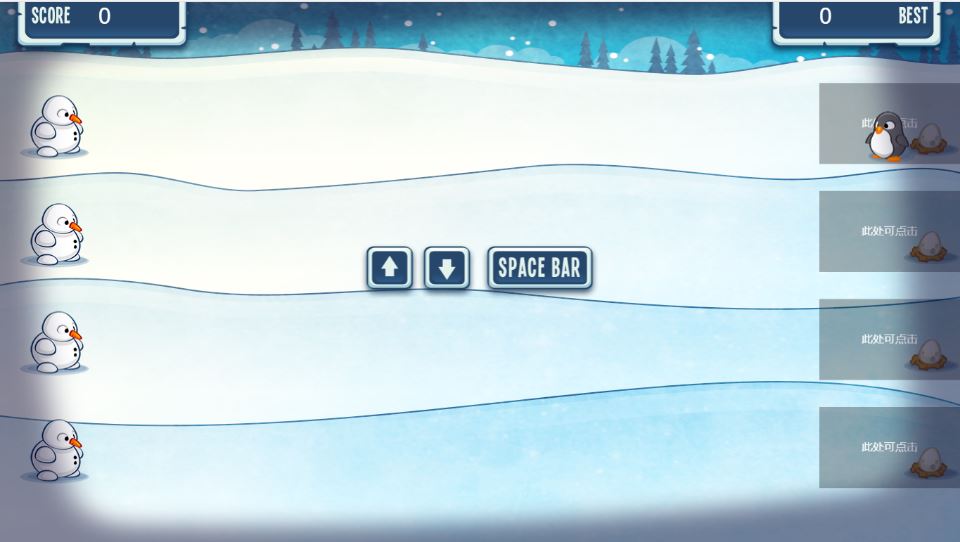
游戏里玩家雪人的移动是通过上下方向键完成的,发射雪球则是空格键。在手机端,当然是希望点击完成。所以,我在每个轨道末端添加了一个点击区。第一次点击是移动,第二次点击是发射雪球。
import Phaser from 'phaser'

export default class TouchRect extends Phaser.GameObjects.Graphics {
  constructor(scene, x, y, width, height, trackId) {
    super(scene, x, y, width, height, trackId)

    this.trackId = trackId
    scene.add.existing(this)
    this.rect = new Phaser.Geom.Rectangle(x, y, width, height)
    this.text = new Phaser.GameObjects.Text(scene, x + width / 2, y + height / 2, '此处可点击').setOrigin(0.5, 0.5)
    scene.add.existing(this.text)
    scene.input.on('pointerdown', this.touch, this)
  }

  draw() {
    this.fillStyle('#333333', 0.3)
    this.fillRectShape(this.rect)
  }

  clearRect() {
    this.setVisible(false)
    this.text.setVisible(false)
  }

  touch(p) {
    if (this.visible === false && this.rect.contains(p.x, p.y)) {
      this.scene.player.handleTouch(this.trackId)
    }
  }
}
// Player.js
handleTouch(i) {
  if (this.currentTrack.id !== i) {
    this.moveToTrack(i)
  } else if (!this.isThrowing) {
    this.throw()
  }
}

moveToTrack(i) {
  this.currentTrack = this.scene.tracks[i]

  this.y = this.currentTrack.y

  this.sound.play('move')
}
// Track.js
import Phaser from 'phaser'
import Snowman from './Snowman'
import PlayerSnowball from './PlayerSnowball'
import EnemySnowball from './EnemySnowball'
import TouchRect from './TouchRect'

export default class Track {
  constructor(scene, id, trackY) {
    this.scene = scene
    this.id = id
    this.y = trackY
    this.gameWidth = scene.game.config.width
    this.gameHeight = scene.game.config.height
    // ……

    this.touchRect = new TouchRect(scene, this.gameWidth - 200, this.y - this.gameHeight * 0.15, 200, this.gameHeight * 0.15, id)
    this.touchRect.draw()
  }

  start(minDelay, maxDelay) {
    // ……
    this.touchRect.clearRect()
  }
}
至此,游戏适配部分基本完成(其余细节忽略)。
部署
webpack externals
因为我的 ecs 只有 1M 带宽,为了加快加载,只能通过 cdn 加载 Phaser。而这就需要用到 webpack 的 externals。externals 的介绍和各种用法这里不表,只写我用到的。
为了在开发时使用本地包,打包线上使用 cdn,需要安装 cross-env 进行环境区分。
// package.json
"scripts": {
  "build": "cross-env ENV=prod webpack --config webpack/prod.js ",
  "start": "cross-env ENV=dev webpack-dev-server --config webpack/base.js --open"
},
// webpack/base.js
new HtmlWebpackPlugin({
  template: "./index.html",
  externals: process.env.ENV === 'prod' ? [
    {
      script: '<script crossorigin="anonymous" integrity="sha512-2kb3Q9IR7K9be52kC2yJGEflRxcLWqIzKlwki1I6Y9TMP2sqneTYdbYe1b/+7EJyr2c8mBH6/QrlC+eqbvJdSg==" src="https://lib.baomitu.com/phaser/3.50.1/phaser.min.js"></script>'
    }
  ] : []
}),
// index.html
<!DOCTYPE html>
<html lang="en">
<head>
  <meta charset="UTF-8">
  <meta name="viewport" content="width=device-width, initial-scale=1.0">
  <title>snowmen-attack</title>
  <% htmlWebpackPlugin.options.externals.map(function(item){ %>
  <%= item.script ? item.script : '' %>
  <% }) %>
</head>
<body>
  <div id="root">加载中……</div>
</body>
</html>
oss
图片、音频等静态资源我是通过 oss 加速的。因为是第一次使用 oss,所以还是记录一下比较好。
首先,oss 里新建 bucket。
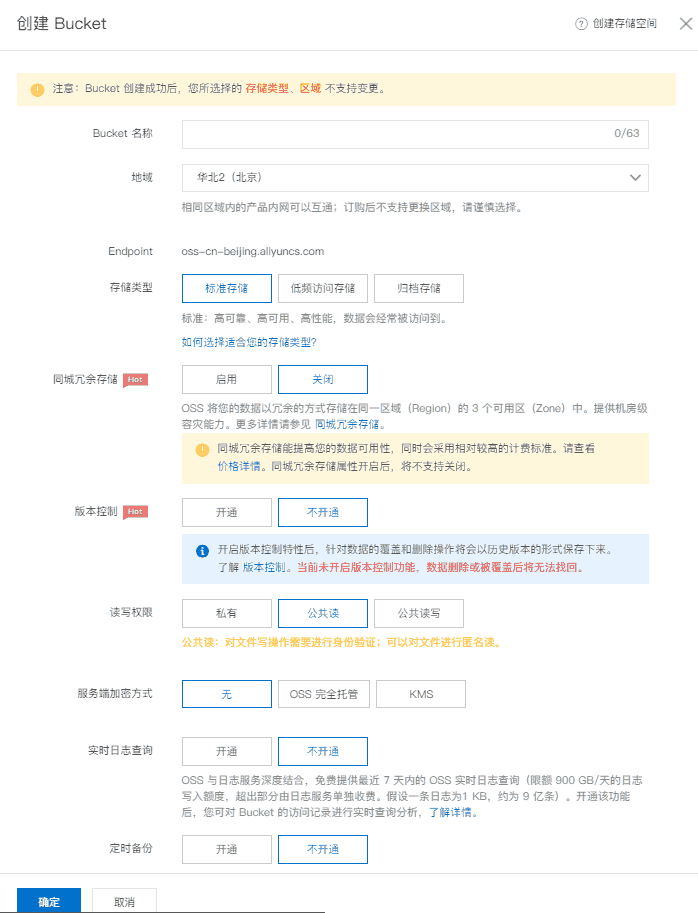
填一下名称,读写权限选择公共读(因为没有用 cdn)。创建好后,进入 bucket 进行文件管理,操作和网盘差不多,不需要后端支持的话直接创建文件夹/上传文件就行。
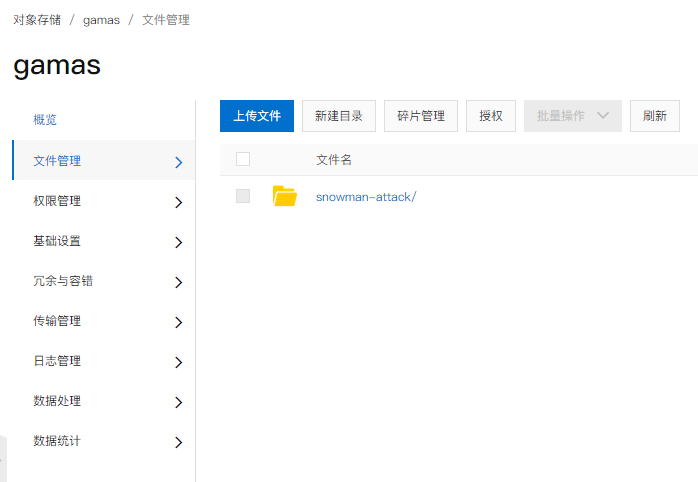
现在可以用了吗?no,还需要设置权限,否则跨域无法访问。
如上图菜单里有个权限管理,进入,跨域设置,创建/编辑规则。如下图:
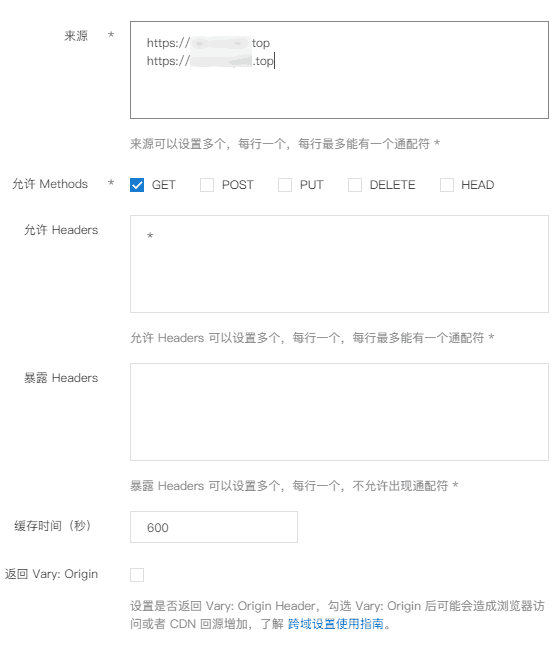
有很多文章在来源那一块填的是通配符,这在我看来很不安全(一般情况通配符确实没问题,因为访问量太低),所以指定了域名。
这样配置之后就没有 oss 跨域问题了。因为指定了域名,也一定程度上防止了盗用导致高额流量费。
最后,别忘了代码里根据环境切换静态资源地址:
// config.js
export const baseUrl = (() => {
  switch (process.env.ENV) {
    case 'prod':
      return 'https://xxx.oss-cn-shanghai.aliyuncs.com/snowman-attack/1.0.0/'
    default:
      return './public/'
  }
})()