Table of Contents
之前有写过用 puppeteer 作为 ssr 解决方案的文章。那个对于旧项目适配很合适,新项目还是一开始就采用 ssr 框架比较好。所以,我把“品词轩”用 nuxt 重新实现了一下。
项目介绍
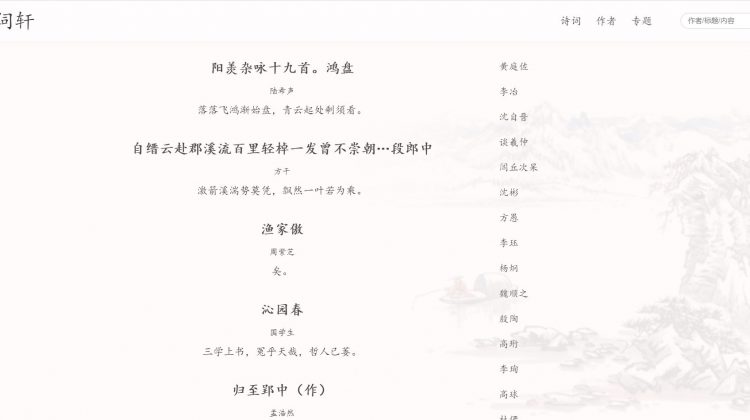
用 nuxt 实现的诗词网站。功能简单,主要就是为了了解一下 nuxt。(vapper 好像比 nuxt 好用些。)
项目地址:https://github.com/tonyzhou1890/poem-v4-nuxt
网站地址:https://poem-nuxt.tony93.top
实现解析
技术栈
nuxt
Nuxt 简介
nuxt 是基于 vue 的 ssr 框架。方便了 ssr 开发,但也有诸多约束。nuxt 的路由可以是约定式,也可以自定义。约定式路由模式下,pages 下面就是各个页面,layouts 下面是布局。其在 vue 原有的生命周期上添加了 asyncData 和 fetch。asyncData 在页面创建前调用,是阻塞的。所以可以在 asyncData 里请求 api。fetch 是在 created 之后调用,主要用来填充 store 数据,非阻塞。
篇幅有限,就不完整介绍 nuxt 了。反正 nuxt 文档挺长的。
项目结构
/.
│  .editorconfig
│  .eslintrc.js
│  .gitignore
│  .prettierrc
│  ecosystem.config.js // pm2 配置文件
│  jsconfig.json
│  nuxt.config.js // nuxt 配置文件
│  package.json
│  README.md
│  tsconfig.json
│  yarn.lock
│
├─assets // 需要打包引用的资源文件
│  │  global.ts // 这个我随便放的
│  │  README.md
│  │
│  ├─icons
│  │  └─svg
│  │          xxx.svg
│  │
│  ├─images
│  │      background.png
│  │
│  └─style
│          global.less
│          variables.less
│
├─components
│  │  Header.vue
│  │  README.md
│  │
│  ├─Pagination
│  │      index.vue
│  │
│  ├─PoemItemCom
│  │      index.vue
│  │
│  ├─PoemListCom
│  │      index.vue
│  │
│  ├─SvgIcon
│  │      index.vue
│  │
│  └─Tabs
│          index.vue
│
├─layouts
│      default.vue
│      README.md
│
├─middleware
│      README.md
│
├─pages
│      article.vue
│      author.vue
│      authorList.vue
│      collection.vue
│      index.vue
│      poemList.vue
│      README.md
│      search.vue
│      subject.vue
│      subjectPoem.vue
│
├─plugins
│      axios.js
│      icon.js
│      README.md
│      svgo.yml
│
├─services
│      api.ts
│
├─static
│      favicon.ico
│      README.md
│      robots.txt // 练习项目,不需要搜索引擎抓取
│
└─store
        index.js
        README.md
Axios 的使用
在有 this 的生命周期里,使用 this.$axios,在 asyncData 里使用解构参数里的 $axios。
// pages/index.vue
export default Vue.extend({
  name: 'Home',
  asyncData({ $axios }) {
    return Promise.all([
      $axios.get(urls.home, {
        params: {
          home: true,
        },
      }),
      $axios.get(urls.poemListRandom),
    ]).then((res) => {
      return {
        authors: res[0].data.authors,
        poems: res[1].data,
      }
    })
  },
  data() {
    return {
      poems: [],
      authors: [],
    }
  },
}
但在使用之前需要配置一下。axios 是作为插件使用的,所以需要在 plugins 文件夹下编写 axios.js 文件。
// plugins/axios.js
export default function ({ app: { $axios } }) {
  // 数据访问前缀
  $axios.defaults.baseURL = 'https://xxx/xxx'

  $axios.interceptors.request.use(
    (config) => config,
    (error) => {
      Promise.reject(error)
    }
  )

  $axios.interceptors.response.use(
    (response) => {
      if (response.data.code !== 0) {
        return Promise.reject(response.data)
      } else {
        return response.data
      }
    },
    (error) => {
      return Promise.reject(error)
    }
  )
}
// nuxt.config.js
export default {
  // Plugins to run before rendering page: https://go.nuxtjs.dev/config-plugins
  plugins: ['@/plugins/axios'],

  // Modules: https://go.nuxtjs.dev/config-modules
  modules: [
    // https://go.nuxtjs.dev/axios
    '@nuxtjs/axios',
  ],

  // Axios module configuration: https://go.nuxtjs.dev/config-axios
  axios: {},
}
Svg-Icon 的封装
为了方便地使用 svg,需要封装一个 svg-icon 组件。
// components/SvgIcon/index.vue
<template>
  <svg :class="svgClass" aria-hidden="true">
    <use :xlink:href="iconName" />
  </svg>
</template>

<script>
export default {
  name: 'SvgIcon',
  props: {
    iconClass: {
      type: String,
      required: true,
    },
    className: {
      type: String,
      default: '',
    },
  },
  computed: {
    iconName() {
      return `#icon-${this.iconClass}`
    },
    svgClass() {
      if (this.className) {
        return 'svg-icon ' + this.className
      } else {
        return 'svg-icon'
      }
    },
  },
}
</script>

<style scoped>
.svg-icon {
  width: 1em;
  height: 1em;
  vertical-align: -0.15em;
  fill: currentColor;
  overflow: hidden;
}
</style>
// plugins/icon.js
import Vue from 'vue'
import SvgIcon from '@/components/SvgIcon' // svg组件

// register globally
Vue.component('SvgIcon', SvgIcon)

const req = require.context('@/assets/icons/svg', false, /\.svg$/)
const requireAll = (requireContext) => requireContext.keys().map(requireContext)
requireAll(req)
// nuxt.config.js
import path from 'path'

export default {
  // Global CSS: https://go.nuxtjs.dev/config-css
  css: ['@/assets/style/variables.less', '@/assets/style/global.less'],

  // Plugins to run before rendering page: https://go.nuxtjs.dev/config-plugins
  plugins: ['@/plugins/icon', '@/plugins/axios'],


  // Build Configuration: https://go.nuxtjs.dev/config-build
  build: {
    extend(config, _) {
      const svgRule = config.module.rules.find((rule) => rule.test.test('.svg'))
      svgRule.exclude = [path.resolve(__dirname, 'assets/icons/svg')]

      // Includes /assets/icons/svg for svg-sprite-loader
      config.module.rules.push({
        test: /\.svg$/,
        include: [path.resolve(__dirname, 'assets/icons/svg')],
        loader: 'svg-sprite-loader',
        options: {
          symbolId: 'icon-[name]',
        },
      })
    },
  },
}
less 的使用和全局样式
安装完 less 和 less-loader 就可以使用 less 了。至于全局样式,创建好文件后 nuxt.config.js 里配置一下就可以了。
// nuxt.config.js
export default {
  // Global CSS: https://go.nuxtjs.dev/config-css
  css: ['@/assets/style/variables.less', '@/assets/style/global.less'],
}
keep-alive 的使用
因为首页的诗词是随机的,所以首页需要使用 keep-alive 属性,避免每次回到首页都是不一样的内容。
// layouts/default.vue
<Nuxt keep-alive :keep-alive-props="{ include: ['Home'] }" />
include 数组里的组件名称就是组件的 name 属性。如果没写 name,就是 nuxt 自动生成的组件名称。
head 的配置
既然是针对 seo 的改版,metaInfo 自然是需要的。在 nuxt 里,只需要配置页面的 head 属性就可以。
// pages/author.vue
export default Vue.extend({
  name: 'Author',
  head() {
    return {
      title: `作者--${this.$route.query.author}`,
      meta: [
        {
          hid: 'description',
          name: 'description',
          content: `${this.$route.query.author}的诗词`,
        },
      ],
    }
  },
})
除了各个页面单独配置,最好也设置一个全局的。
// nuxt.config.js
export default {
  // Global page headers: https://go.nuxtjs.dev/config-head
  head: {
    title: '品词轩',
    htmlAttrs: {
      lang: 'zh',
    },
    meta: [
      { charset: 'utf-8' },
      { name: 'viewport', content: 'width=device-width, initial-scale=1' },
      { hid: 'description', name: 'description', content: '' },
    ],
    link: [{ rel: 'icon', type: 'image/x-icon', href: '/favicon.ico' }],
  },
}
路由参数变化
nuxt 并没有默认根据参数变化重新渲染页面。路由相同的页面,不管参数怎么变,nuxt 都视为同一个页面。这在实际应用中肯定是不合适的。所以,需要打开参数监听——watchQuery。
// nuxt.config.js
export default {
  // https://www.nuxtjs.cn/api/pages-watchquery
  watchQuery: true,
}
然后,在页面里设置需要监听的参数。
// pages/search.vue
export default Vue.extend({

  watchQuery: ['ap', 'tp', 'cp', 'type', 'keyword'],
})
部署
本地开发完后提交 git,然后服务器上拉取项目,安装依赖。然后 yarn build 打包。
我是 nginx + node 的形式。nginx 根据域名代理到 nuxt 服务端口。
按照 nuxt 文档的指引,建立的 ecosystem.config.js 文件,但 pm2 start 启动后怎么也无法访问。用 netstat -tunlp 命令也看不到 3000 端口。
// ecosystem.config.js
module.exports = {
  apps: [
    {
      name: 'NuxtAppName',
      exec_mode: 'cluster',
      instances: 'max', // Or a number of instances
      // script: './node_modules/nuxt/bin/nuxt.js',

      script: 'yarn',
      args: 'start'
    }
  ]
}
后来我把 script 部分换成 yarn,package.json 里的命令加上端口就好了。
// package.json
"scripts": {
  "start": "nuxt-ts start --port 8100",
},
本来以为部署会很顺利,没想到折腾了好久~~~~~~
性能
相比于 puppeteer 方案,nuxt 性能要好很多。在不使用缓存的情况下,浏览器端测试 qps 可以达到 30。配置为 1C2G1M 的 ecs。
总结
相比于传统服务端渲染,nuxt 和 puppeteer 都是首次加载服务端渲染,后续操作客户端渲染。所以虽然性能稍差,但可以满足需求。特别是 nuxt 这一类的方案,其性能优于 puppeteer,结合 redis 一类的内存缓存技术应该可以达到较高的 qps。但 puppeteer 泛用性强,不限定技术栈,并且还可以用于爬虫、海报渲染等场景。所以具体用什么方案还是得看场景。
